


Canon AE-1 Program Instruction Manual: A Comprehensive Guide
The Canon AE-1 Program is a celebrated 35mm SLR camera. This guide helps users navigate its features. It offers detailed instructions and valuable insights for both novice and experienced photographers. It explains how to best use the camera.
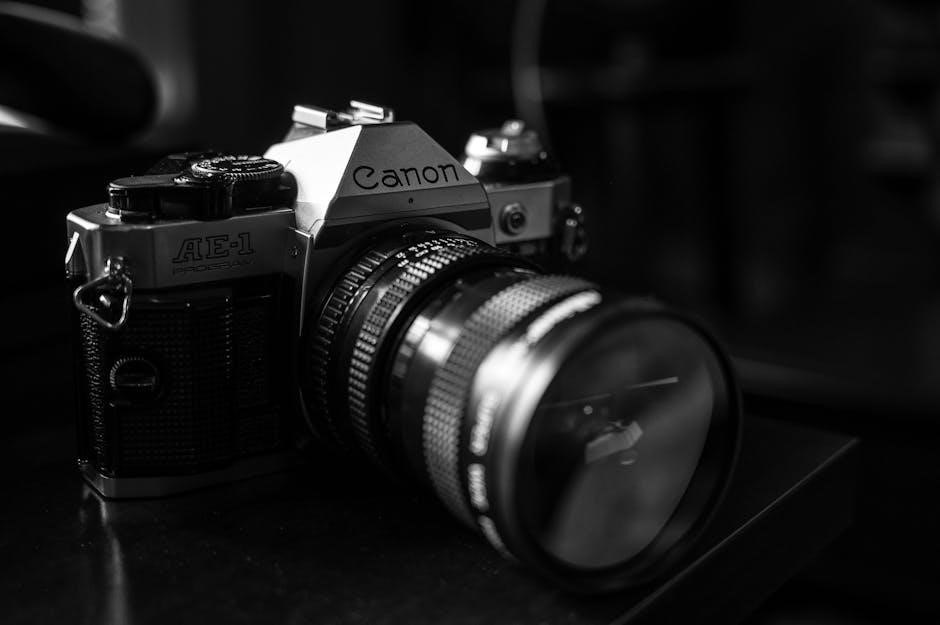
The Canon AE-1 Program‚ launched in 1981‚ stands as a significant milestone in 35mm SLR camera history. Building upon the success of the AE-1‚ this model introduced programmed auto-exposure‚ simplifying photography for a broader audience.
This camera isn’t easily categorized‚ blending features that appeal to both beginners and seasoned enthusiasts. Its electronic controls and user-friendly design made it a popular choice among amateur photographers‚ while its capabilities satisfied more experienced users.
This instruction manual serves as a comprehensive guide to unlocking the full potential of the Canon AE-1 Program. Whether you’re a newcomer eager to explore film photography or a seasoned pro revisiting a classic‚ this manual provides the knowledge needed to master this iconic camera. It covers everything from basic operations to advanced techniques‚ ensuring every user can capture stunning images with confidence.
Learn about loading film‚ understanding exposure modes‚ mastering focus‚ and troubleshooting common issues. This resource empowers you to fully appreciate the Canon AE-1 Program’s capabilities. Embrace the blend of classic design and innovative technology.
Key Features and Specifications
The Canon AE-1 Program boasts several key features that made it a standout camera. It has an electronically controlled shutter‚ offering precise exposure control.
Its program mode automatically selects both shutter speed and aperture. This simplifies shooting in various conditions. Shutter-priority AE allows users to set the shutter speed. The camera then selects the appropriate aperture. Manual mode grants full control over both settings.
The AE-1 Program uses Canon’s FD lens mount. This provides access to a wide range of quality lenses. A bright viewfinder aids in composition and focusing. The camera features a built-in light meter. This ensures accurate exposure readings.
Other specifications include a vertical-travel shutter‚ various shutter speeds‚ and ISO settings. The camera operates on batteries‚ powering its electronic functions.
Understanding these features and specifications is crucial. This allows photographers to fully leverage the Canon AE-1 Program’s capabilities. Whether shooting portraits‚ landscapes‚ or action shots‚ the AE-1 Program provides the tools needed for creative expression. Its blend of automation and manual control offers versatility for different photographic styles.
Understanding the Camera’s Controls
Familiarizing yourself with the Canon AE-1 Program’s controls is essential for effective operation. The shutter speed dial is located on the top right. It allows selection of shutter speeds or program mode.
The aperture ring‚ found on the lens‚ controls the lens opening. In program mode‚ it should be set to “A” for automatic operation. The film advance lever‚ also on top‚ advances the film after each shot.
The ISO dial‚ typically found around the rewind knob‚ sets the film speed. The viewfinder provides crucial information. This includes the selected shutter speed and aperture. The shutter release button‚ when pressed halfway‚ activates the light meter.
The lens release button allows for changing lenses. The self-timer lever enables delayed shooting. Understanding these controls empowers photographers. It allows them to make informed decisions. It also enables them to capture the desired images. Each control plays a vital role in the exposure process. Mastering them is a key step in utilizing the AE-1 Program’s full potential.
Knowing the location and function of each control enhances the shooting experience. It also contributes to better‚ more consistent results.
Loading and Unloading Film
Loading film into the Canon AE-1 Program is a straightforward process. First‚ open the camera back by pulling up the rewind knob. Insert the film cartridge into the film chamber‚ pushing it down to ensure it’s secure. Pull the film leader across the camera body and insert it into one of the slots on the take-up spool.
Advance the film using the film advance lever‚ and then press the shutter release button. Repeat this process a couple of times to ensure the film is properly engaged and advancing correctly. Close the camera back‚ making sure it clicks shut.
Continue advancing the film until the frame counter shows “1”. The camera is now ready to take pictures.
When the roll is finished‚ the film advance lever will stop. Do not force it. Rewind the film back into the cartridge by flipping out the rewind crank and turning it in the direction indicated by the arrow. Once rewound‚ open the camera back and remove the film cartridge. Take it for processing. Avoid direct sunlight when loading and unloading film.
Proper loading and unloading will prevent damage to the film. It also helps to ensure clear and beautiful photos.
Exposure Modes: Program‚ Shutter Priority‚ and Manual
The Canon AE-1 Program offers three primary exposure modes‚ providing flexibility for various shooting conditions. The first‚ Program mode (indicated as “Program” on the shutter speed dial)‚ is fully automatic. The camera selects both the aperture and shutter speed for optimal exposure‚ ideal for beginners or fast-paced situations.
Shutter Priority mode (Tv) allows the photographer to choose the shutter speed. The camera then automatically selects the appropriate aperture. This is useful for controlling motion blur or freezing action. Fast shutter speeds freeze motion‚ while slow speeds blur it.
Manual mode (M) grants complete control over both aperture and shutter speed. Photographers adjust both settings independently‚ using the camera’s light meter as a guide. This mode is perfect for challenging lighting situations or creative effects. Understanding the relationship between aperture and shutter speed is crucial in manual mode.
Each mode offers unique advantages. Selecting the appropriate mode based on the desired outcome is essential for achieving well-exposed and creatively compelling photographs. Experimenting with each mode helps to improve your understanding of exposure. It also helps you to unlock the full potential of the Canon AE-1 Program.
Using the Program Mode

The Program mode on the Canon AE-1 Program is a fully automatic exposure setting‚ designed for ease of use and quick shooting. To engage Program mode‚ first‚ ensure your lens aperture ring is set to the “A” or “Auto” position. Next‚ rotate the shutter speed dial to the “Program” setting. The camera will now automatically select both the optimal aperture and shutter speed based on the available light.
This mode is perfect for beginners who are still learning about the relationship between aperture and shutter speed. It’s also valuable for experienced photographers in situations where speed is critical‚ such as street photography or capturing fleeting moments. The camera handles the technical aspects of exposure‚ allowing you to focus on composition and timing.
While in Program mode‚ the camera prioritizes a balanced exposure. It selects settings that minimize the risk of over or underexposure. However‚ it’s important to be aware of the limitations. The camera cannot anticipate your creative intentions. You cannot control depth of field or motion blur.
Program mode simplifies photography. It makes the AE-1 Program an accessible tool for anyone wanting to capture images without complex manual adjustments. Point‚ shoot‚ and let the camera do the work.
Mastering Shutter Priority Mode
Shutter Priority mode (Tv) on the Canon AE-1 Program gives you control over the shutter speed. It allows you to creatively manipulate motion in your photographs. To use it‚ set the lens aperture ring away from “A”. Choose the desired shutter speed on the dial. The camera automatically selects the appropriate aperture for correct exposure.
This mode excels in situations where controlling motion is key. Use fast shutter speeds to freeze action‚ like sports or wildlife photography. Alternatively‚ use slow speeds to create motion blur‚ ideal for capturing flowing water or light trails. Experiment with different speeds to see the effects.
When selecting a shutter speed‚ consider the lighting conditions. In bright light‚ faster speeds are possible without underexposure. In low light‚ slower speeds may require a tripod to avoid camera shake. The AE-1 Program’s light meter helps gauge the correct exposure. Be mindful of the selected aperture to avoid extreme settings that affect image quality.
Mastering Shutter Priority mode unlocks creative potential. It lets you fine-tune your images. It allows you to capture dynamic scenes‚ and express your artistic vision with the AE-1 Program.
Exploring Manual Mode for Creative Control
Manual mode (M) on the Canon AE-1 Program offers complete control over both aperture and shutter speed. This allows you to make all exposure decisions. It empowers experienced photographers. It also allows creative experimentation. To engage manual mode‚ set the lens aperture ring away from “A”. Set the shutter speed dial to your desired setting;
In manual mode‚ the camera’s light meter acts as a guide‚ indicating whether your settings will result in over or underexposure. Adjust either the aperture or shutter speed until the meter reads zero‚ signifying proper exposure. However‚ feel free to deviate from the meter’s recommendation for artistic effect.
Manual mode is ideal for challenging lighting situations where automatic modes may struggle. For instance‚ in high-contrast scenes‚ you can manually adjust the exposure to preserve detail in both shadows and highlights. It is also useful for consistent exposure across a series of shots‚ like when shooting a panorama.
Exploring manual mode deepens your understanding of the exposure triangle (aperture‚ shutter speed‚ and ISO). It gives you creative freedom. Mastering this mode unlocks the full potential of your AE-1 Program. It allows you to capture your unique vision;
Focusing Techniques for Sharp Images
Achieving sharp focus is crucial for capturing high-quality images with your Canon AE-1 Program; The camera utilizes a manual focusing system. Understanding how to use it effectively is key.
The AE-1 Program features a split-image rangefinder and a microprism collar in the viewfinder. These tools assist in achieving accurate focus. The split-image rangefinder shows a split image until the subject is in focus‚ at which point the two halves align. The microprism collar surrounds the split-image. It makes it easier to see when the image is nearly in focus. The image snaps into sharpness when correct.
To focus‚ look through the viewfinder and rotate the focusing ring on the lens until the split image aligns or the microprism collar appears sharp. Pay attention to your subject and ensure that the critical elements are in focus. For portraits‚ focus on the eyes. For landscapes‚ consider using hyperfocal distance to maximize depth of field.
Practice makes perfect when it comes to manual focusing. Experiment with different subjects and distances to develop your technique. With patience and a keen eye‚ you’ll be able to consistently achieve sharp‚ stunning images with your AE-1 Program.
Using Different Lenses with the AE-1 Program
The Canon AE-1 Program’s versatility shines through its compatibility with a wide range of Canon FD lenses. Each lens offers unique perspectives and creative possibilities. Understanding how to utilize different lenses can significantly enhance your photography.
FD lenses are designed specifically for Canon’s manual focus SLR cameras. They provide excellent image quality and a wide array of focal lengths and apertures. From wide-angle lenses perfect for landscapes to telephoto lenses ideal for wildlife and sports‚ the FD system has something for every photographer.
When mounting a lens‚ align the red dot on the lens with the red dot on the camera body and rotate the lens clockwise until it clicks into place. To remove the lens‚ press the lens release button on the camera body and rotate the lens counterclockwise.
Different lenses will affect the depth of field and perspective of your images. Wide-angle lenses offer a broader field of view and greater depth of field. Telephoto lenses compress perspective and provide a shallower depth of field. Experiment with different lenses to discover how they can transform your vision into stunning photographs.
Troubleshooting Common Issues
Even with its robust design‚ the Canon AE-1 Program can sometimes encounter issues. Addressing these problems promptly can save time and frustration;
One common issue is a malfunctioning light meter. If your images are consistently over or underexposed‚ the meter might be faulty. Ensure the battery is fresh and properly installed. Clean the battery contacts with a soft cloth.
Another potential problem is a jammed shutter. This can occur due to mechanical issues or a weak battery. Try gently advancing the film advance lever. If the shutter remains stuck‚ avoid forcing it‚ which could cause further damage.
Film loading errors can also lead to issues. Make sure the film is properly seated on the take-up spool. Ensure the film leader is correctly aligned.
If you encounter error messages or unusual behavior‚ consult the instruction manual for specific troubleshooting steps. Online forums and communities can also provide valuable insights and solutions from other AE-1 Program users. Remember‚ professional repair services are available for complex issues.
Maintenance and Care Tips
Proper maintenance ensures the longevity and optimal performance of your Canon AE-1 Program. Regular cleaning is essential. Use a soft‚ lint-free cloth to wipe down the camera body and lens elements. Avoid harsh chemicals or abrasive materials.
Protect the lens from dust and scratches by using a lens cap when not in use. Store the camera in a cool‚ dry place to prevent fungus growth. A camera bag provides additional protection during transport.
Periodically inspect the battery compartment for corrosion. Clean any corrosion with a cotton swab dipped in vinegar. Replace the battery when necessary to avoid leakage.
Check the light seals around the film door. Replace them if they become brittle or deteriorated. This prevents light leaks that can ruin your photos.

Avoid exposing the camera to extreme temperatures or humidity. These conditions can damage the electronic components and mechanical parts.
If you plan to store the camera for an extended period‚ remove the battery. This prevents potential damage from battery leakage. By following these maintenance and care tips‚ you can ensure your Canon AE-1 Program remains in excellent working condition for years to come.
Finding and Utilizing the Instruction Manual
Locating the instruction manual for your Canon AE-1 Program is crucial for fully understanding its capabilities. Original printed manuals can sometimes be found on online auction sites or through vintage camera dealers. These provide an authentic‚ tactile experience and can be a valuable collector’s item.
Alternatively‚ digital versions of the manual are readily available online. Many websites offer free PDF downloads of the Canon AE-1 Program instruction manual. These digital manuals are easily accessible on computers‚ tablets‚ and smartphones‚ making them convenient for on-the-go reference.
When utilizing the manual‚ take time to thoroughly read each section. Pay close attention to the diagrams and illustrations‚ as they often provide visual clarity. Keep the manual handy while you are learning the camera’s functions‚ referring to it as needed.
The manual covers essential topics. These topics include: loading film‚ understanding exposure settings‚ and troubleshooting common issues. Use the manual as a guide to experiment with different settings. This will enhance your photographic skills.
Whether you opt for a physical or digital copy‚ the instruction manual is an indispensable resource. It unlocks the full potential of your Canon AE-1 Program.
Leave a Reply
You must be logged in to post a comment.